Saturday 28 May 2011

M57 & M71 Lovely Lace Design


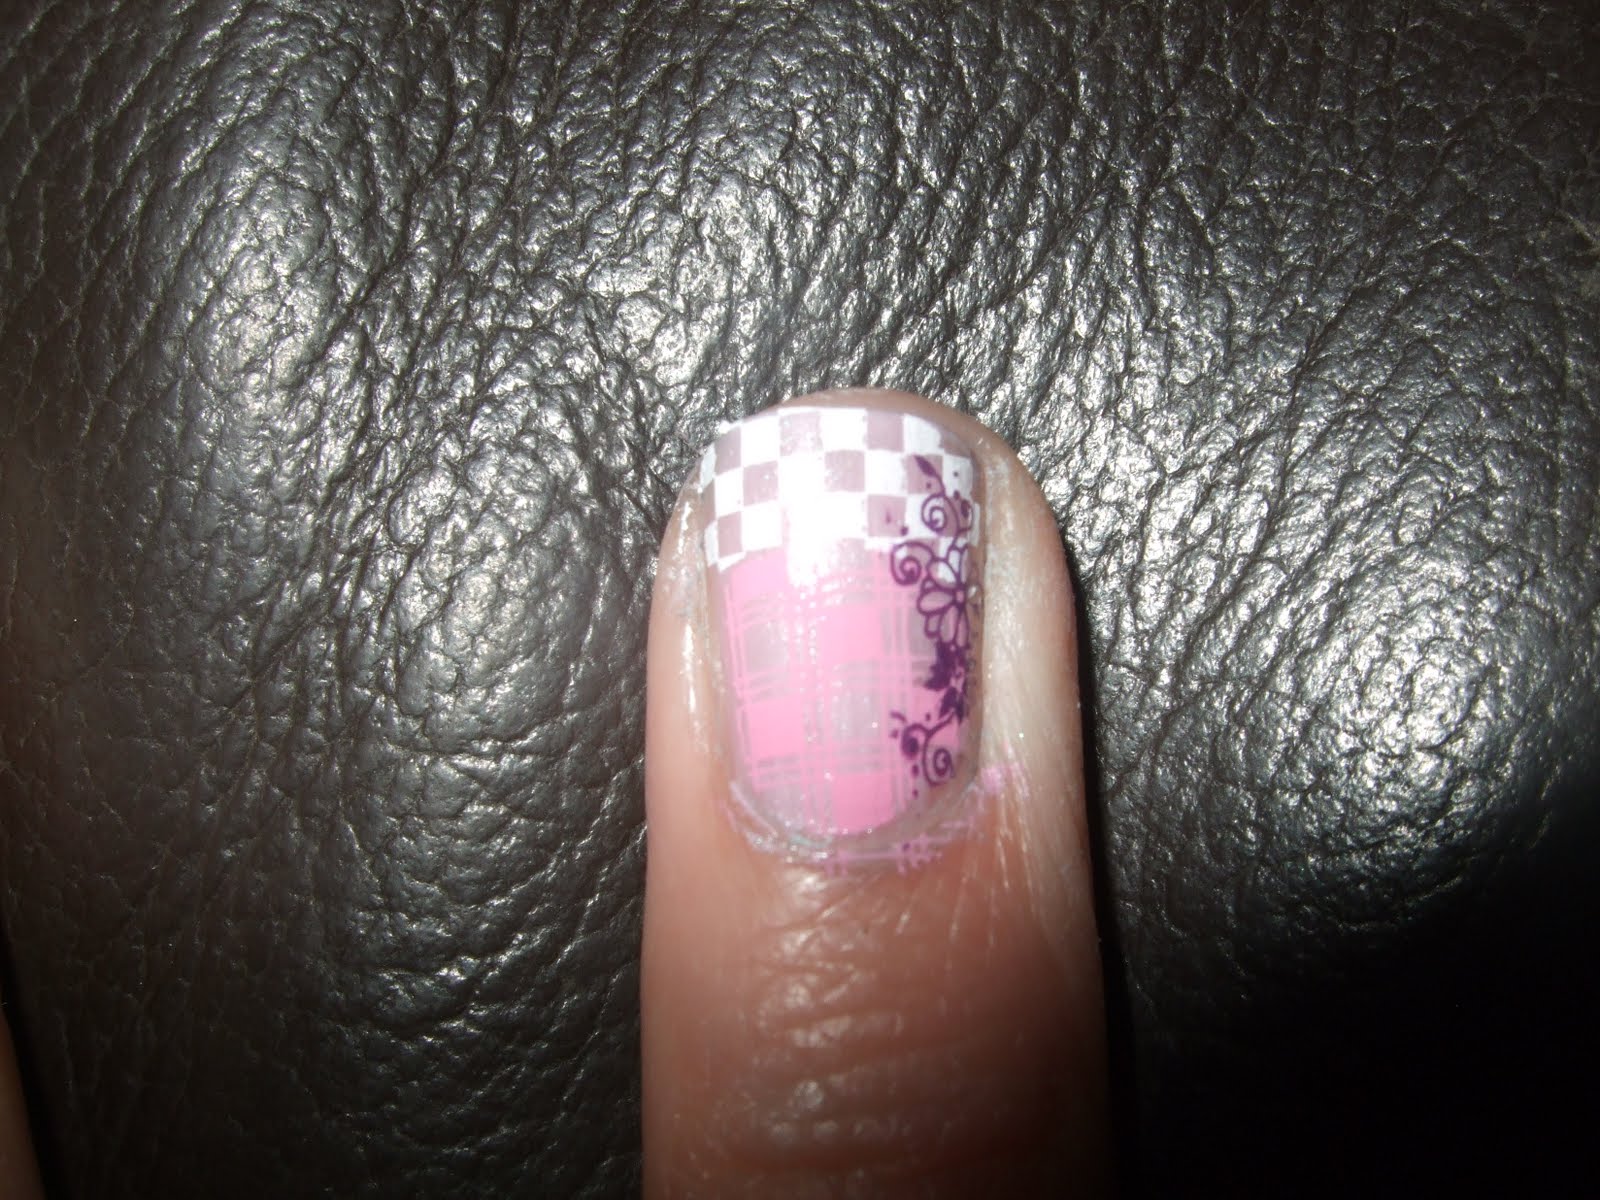
Colours used: Essence Colour & Go in 36 Enchanted Fairy, Rimmel Lycra -500 Peppermint, Konad SP Black & White.
Plate used: Konad M57 & M71


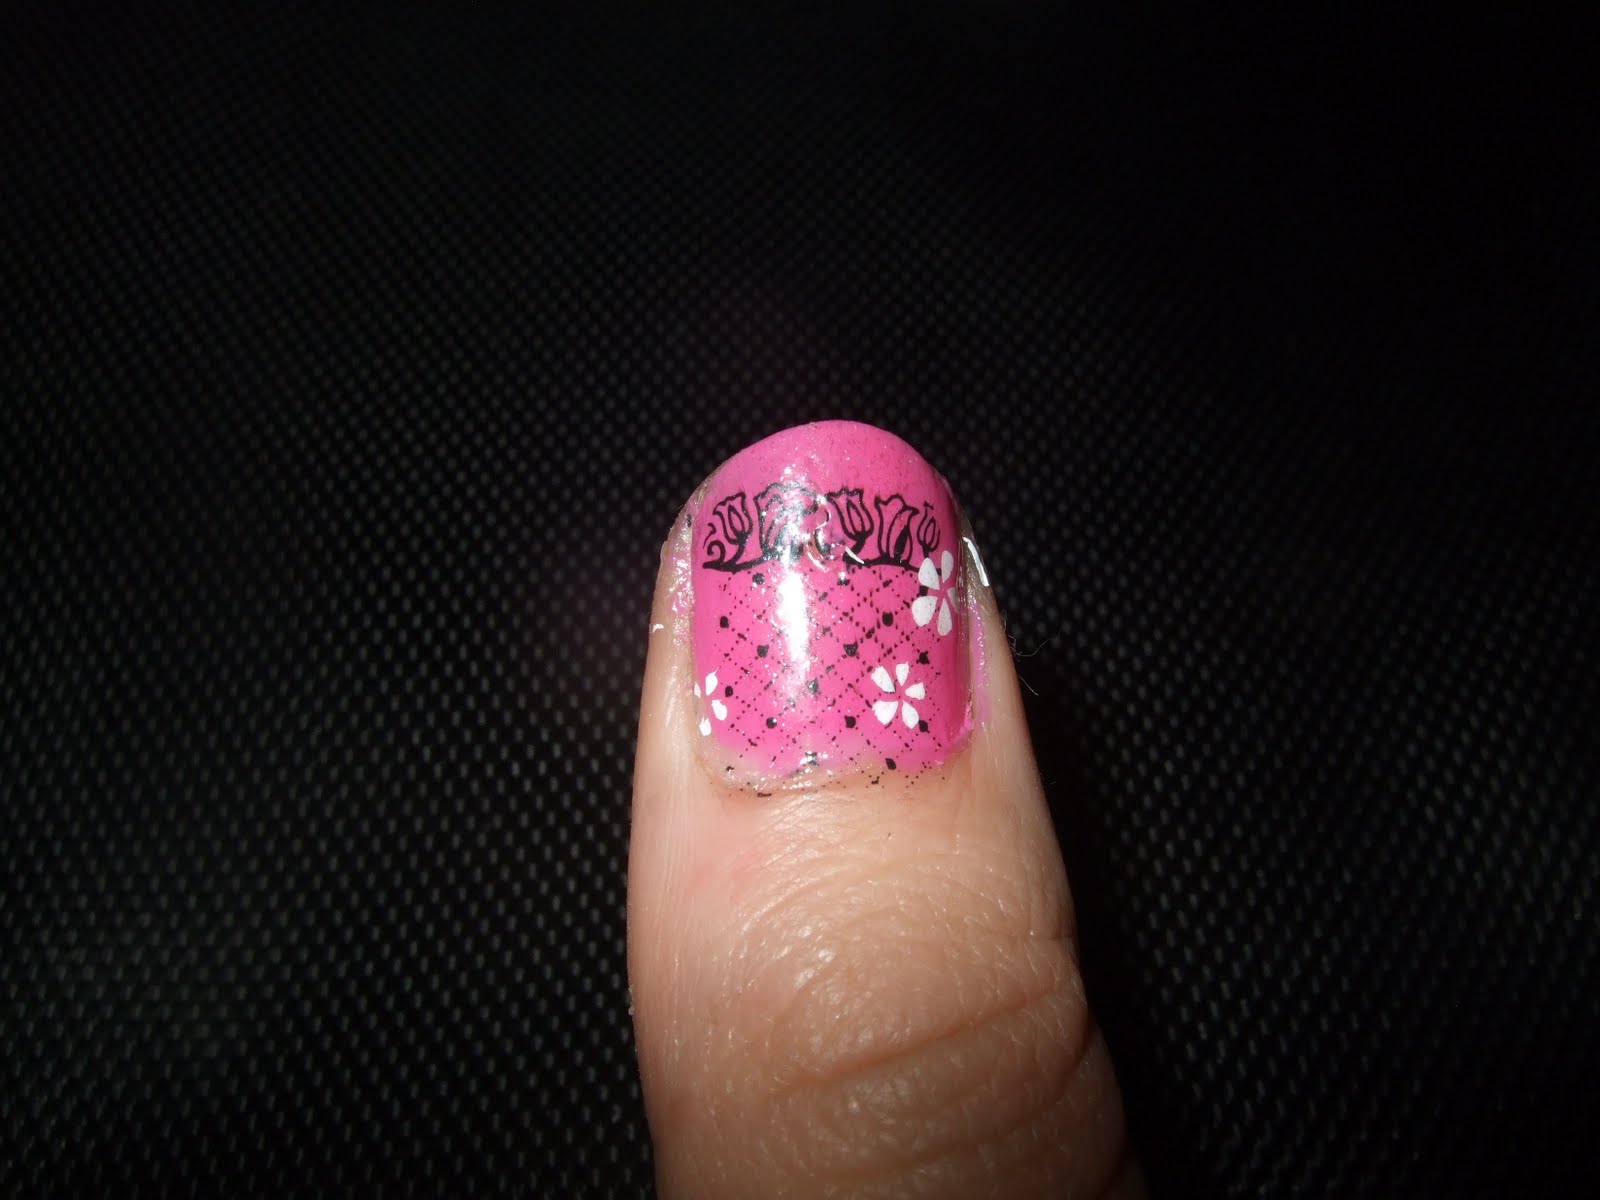
Officially my favourite mani to date!
I absolutely adore this, it is quirky, pretty & very very simple to do :)
I started off by painting a quick base coat and allowing to dry. Then I taped the top 1/4 of my nails with regular sellotape (I stuck it to my jeans first to remove some of the 'stickiness' so I wouldn't rip off the base coat when removing)

I then painted two layers of Essence's shade 36-Enchanted Fairy on the untaped 3/4 section. After this had dried (and without removing the tape) I stamped the net motif from Konad M57. I then sealed this with a glitter top coat and allowed to completely dry.
I then carefully removed the sellotape by peeling it off slowly and carefully.
I painted the top 1/4 of my nail taking care not to paint over the section I had already painted. (This is where the top coat comes in handy-if you do make a mistake you can easily remove the overlap without having to re-do the entire nail) For this I used Rimmel's Lycra polish in 500 - Peppermint.

After the top coat had dried I carefully aligned the lace motif from Konad M71 to overlap the green & pink colours. This was very easy to align as the sellotape guide at the start gave me a straight line to stamp across :)
I then sealed with a clear top coat.
Again I love love love this! It looks like stickers on my nails, it is really pretty & perfect, I'm tempted to keep it for a few days instead of my usual 24 hours, it's a design I won't get bored of looking at easily :D


Konad M64 Red and Gold

 Colours used: Barry M Nail Paint - 273 Raspberry, Revlon -  900 Gold Get 'Em & Konad SP Black
.Plate used: Konad M64.
I just bought this great new red nail varnish called Barry M - 273 Raspberry. It is a lovely colour with a hint of raspberry/cherry fusion.
 
I applied two coats and then sponged on gold tips using a transparent glitter gold varnish, I used Revlon's Gold - 900 Get 'Em.
I use a make-up sponge for this technique, starting at the tips and working half-way down the nail so that there is more varnish on the tips. After it has dried I go over the top-most parts for added colour-blending.

At this point my cat Lucy decided to lie on the cushion I was using to photograph my nails on, so I used her instead =^..^=
Lucy sticking her tongue out - she's usually much prettier :)
I then chose Konad M64, the criss-cross motif, and stamped it in black.
Then a thin layer of top-coat to seal the design, and Voila!! ***The gold stamp took aaaagggeeesss to dry, next time will ensure that I pick up less varnish with the make-up sponge :)

Friday 27 May 2011

M83 Fatal Polish!

   
Colours used: Essence multi Dimension xxxl shine Nail Polish in shade 20-Fatal Black & Konad SP White
.Plate used: Konad M83.

I done something very scary today, I bought black nail varnish  :O
I have never ever worn black, I always thought it was a goth-only colour and stayed at the other end of the colour spectrum! But today I decided to bite the bullet and go for it.
I'm loving Essence polishes lately, they're cheap and cheerful & so far I've been lucky as none have chipped. I chose one called Multi Dimension in shade 20-Fatal (what a great name!) It is a beautiful wet-look polish, and only €2.99.
I needed two coats as the first was kind of a liquorish transparent colour - not nice, and it took about 20 minutes to dry - even then it was still tacky, but I deemed it ready to stamp.
Now a bold colour needs a bold pattern, so I picked a beautiful Lotus-like print from plate M83 which always reminds me of Harlequin wallpaper. I stamped in Konad White.

This Mani was just going to be a test as I'm going out tonight and had planned a spectacular French Mani in pink & silver, but I think I'll keep this. It will definitely get noticed and I'm looking forward to hearing some feedback!


Konad M73 & M71 Flowers & Lace

 Colours used: Rimmel Lycra Pro in 293 Pop Rose, Konad SP Black & Konad SP White
.Plate used: Konad M73 & M71

I painted two coats of Rimmel Pop Rose & allowed to completely dry.
(I forgot to photograph the next bit so I'll try be overly descriptive!) When it had completely dried I took small squares off a roll of sellotape and used it to tape of the top corner of one nail at a diagonal angle, from just under the tip at one side to 1/3 the way down the nail at the opposite side. Ensure that the base colour is completely dry before putting sellotape on it or it will peel the colour straight off your nail. I removed some of the 'stickiness' from the tape by sticking it to my jeans first!
I then stamped with the beautiful floral design on plate M73. This always stamps really well for me :)
Before removing the sellotape I went over the stamped design with a top coat.
I then removed the sellotape and in the section left I carefully aligned the white lace design from Konad Plate M71. I stamped this slowly, using the slight line left behind from the top coat as a guide.
I then sealed the entire design with Essence Glitter Top Coat, I actually used two coats of this as the glitter is very sparse & small.
This design took about an hour to complete, mainly because of the time required for the varnish to dry completely between coats.


Wednesday 25 May 2011

Konad M73 Thundercats!!

 Colours used: Rimmel Lycra Pro in 500 Peppermint, Konad SP Dark Purple & Konad SP Summer Blue
.Plate used: Konad M73.

I have a massive collection of polishes that I buy online and then when they arrive I decide that I don't like them. Two of these polishes are Rimmel's 60 Second  - 400 Scarlet and Maybelline's Express Finish Diamonds - Gold 40. These are two irridescent shades. I used two coats of the Rimmel followed by one coat of the Gold, which gave a lovely gold/pink hue depending on the light.
The design I chose from plate M73 was one I didn't think I'd ever use! But I love this!!!
It is a really striking design, I love the colour combinations and plan on mixing all my transparent polishes in future, instead of ignoring them ;)


Ooooh I love it!!!

BM 203 Retro Squares


Colours used: Nail Paint by Barry M-317 Blue Moon. Konad SP Summer Blue.
Plate used: Bundle Monster 203.
 
Another day where inspiration refused to strike!
So I decided to try a lesser used BM plate, and one that would be effective without the need to stamp over with another plate. I think this would look fantastic with a holographic polish, it would give it a real sci-fi feel :)
This design stamped really well, the plate did not have to be cleaned in between each stamp - a problem I find with a lot of other full nail designs on the BM plates. I like the Barry M ice blue polish in the background, it is an almost transparent polish so I needed 3 coats and could still see tru the tips.
This would also look really good stamped in two-tone blue and purple like a design a done a few days ago, or even blue and pink.

(I'm waiting on a shipment of China Glaze polishes that's very slowly making it's way to me from Hong Kong, the package is filled with bold metallic and glittering colours, and I will be using this plate time and time again!)


Konad M3 & M56 Love Heart Nails


Colours used: Essence Colour & Go in 36 Enchanted Fairy, Generic White Tip polish.

Plate used: Konad M3 & M56

I wanted to try another tip design. Unfortunately the white tip polish I have is USELESS!!! It's more cream than white & it didn't dry, even after 10 minutes. Still, I wanted to try the plate, so I stamped regardless!
I used the love-heart design from Konad Plate M56, and then used Konad White SP to stamp the loveheart design from Konad Plate M3.
I will try this design again once I've bought a good white tip polish!!!

Tuesday 24 May 2011

Konad M39, M56 & M64

Colours used: Essence Colour & Go in 36 Enchanted Fairy, White Konad SP & Konad Honey Pink SP.
Plate used: Konad M39, M56 & M64


I'm trying to come up with a design for a Facebook/Konad competition, using only the Konad plates (no bundle monster allowed!) I only have 8 plates so I'm trying as many combinations as possible. I like this design, but I think I'd use a different colour instead of the SP Honey Pink as the Plaid design blends too much into the base colour, and the finished effect is much too subtle.
Anyway, here's the technique I used...
I started by painting my nails with two coats of Essence Colour and Go in shade 36-Enchanted Fairy. I lurve this Essence range! This bottle cost me €1.29, what a bargain!
I used the Essence French Manicure Tip Guides to stamp a slightly rounded design.
I started like this:
After I stamped the bottom part (with SP Honey Pink) I waited 5 mins for my nails to dry & moved the tip guides down, covering the top of the parts I had just stamped, so I could stamp my nail tips.
I stamped the bottom design with the Plaid design from Konad Plate M64.  I stamped the tips with the French Tip Chequered Design from Konad Plate M56. (IMO if you're only going to purchase one French tip plate, than make it this French Tip plate!)
After this had dried completely I carefully peeled off the french tip guides (I re-used them on my opposite hand!) This is how they looked...
Sorry, I hadn't cleared off the excess polish yet!
Always one to add an extra splash of colour ;) I chose a cute flower motif to print down the side of each nail. I used a linear one from Konad Plate M39, and stamped with Konad SP Solid Violet, then when this had completely dried I sealed it with a very thin coat of Konad Top Coat.

I thought at the start that my nails were too short to use a French Tip stamp, but as you can see I stamped almost 1/3 of my nail, I used the entire height of the stamp. It really helps to make my nails look really long, I shall be trying out the other French tips post haste!!! :)


Monday 23 May 2011

Konad M64 Two Tone Flowers

Colours used: Rimmel Lycra Pro in 500 Peppermint, Konad SP Dark Purple & Konad SP Summer Blue.

So after a long time testing colour combinations and different stamping/scraping techniques, I came up with this one :)
I don't really like the dark blue and purple SP polishes, I think when stamped on their own they're a very bold polish and they are a bit too dramatic for me! But I'm determined to use them, as they're so expensive! and I don't really have much choice in special polishes at the moment, I think I've only 6 or 7 bottles. So I tried stamping the two colours together to create a two-tone effect. I love it!!! It is striking without being too in your face. The colour clash works really well against the pale blue background.
So here's how I stamped...

I started with two coats of Rimmel Lycra polish- 500 Peppermint. (This is a polish that i return to time & time again, it lasts really well. I have a very hard manual job and this polish chips very little!)

See above how I aligned the colours. You have to be careful that the colours don't run into each other or you get a black stripe.
I then swiped with  the direction of the polishes. I quickly picked up the image with my stamper & placed it onto my nail. The quicker you work, the more detail you will get, as the SP polishes tend to dry quite quickly.

After I finished I allowed the polish to dry for almost 10 minutes before applying a very thin top coat.

I really like this mani!!! I definitely have to try this technique with a few more plates, very very happy with the finished look & design :D


Today... I play!

While I was sitting watching the President of the USA's visit to Ireland, I decided to play with some of the disks I seldom use. I didn't really have any real inspiration for my next design so I thought that by playing around, testing some colour combinations inspiratino would strike! It did :D and my next Blog - Konad M64, is the result of about 2 hours of colour tests.

Here is some pics & descriptions...

Rimmel Pro Lycra finish - 293 Pop Rose base coat (2 coats) stamped with Plate Konad M64, using the chequered design in SP Honey Pink and criss-cross design in SP Shining Silver.

 Rimmel Pro Lycra finish - 500 Peppermint base coat (2 coats) stamped with Plate Konad M56 (Tip) and bottom design from Plate Konad M36, both stamped with SP White.

 Rimmel Pro Lycra finish - 500 Peppermint base coat (2 coats) stamped with Plate Konad M71, using the full nail Floral design in Rimmel 819 - Green with Envy, and Fern design in SP White (Stamped twice).

As above, but without the white Fern stamp detail.

 Rimmel Pro Lycra finish - 293 Pop Rose base coat (2 coats) stamped with Plate BM 214, using the Feather design in SP Shining Silver. (Would be really nice done in two-tone!!)

As above, it is hard to photograph silver on pink, but in real life looks really effective!

Rimmel Pro Lycra finish - 293 Pop Rose base coat (2 coats) stamped with Plate Konad M71, using the Lacey motif design in SP Black and Bow from Plate M3, with a little dot of White SP in the centre. The Lacey design had to be stamped twice, it's really tiny, shame as it is one of the best tip designs, but very hard to align correctly.

Friday 20 May 2011

Konad M71


Colours used: Rimmel Lycra Pro- 293 Pop Rose (again!) White Konad SP, Black Konad SP.
Plate used: Konad M71 & M3.


I had an interview today, I had to have plain nails as I didn't know what kind of an environment it would be! It went well, but I was still rattling with nerves when I got home. Luckily there was something nice in the post to take my mind off it! My new black Konad polish had arrived, so i decided to try out the plate I'd being saving for this special occasion :) I bought plate M71 just for the pretty fishnet & flower design. I was very disappointed with how it stamped. I tried with a load of different polishes, I swiped the scraper in different directions, still didn't get a single complete stamp :(
See all the gaps? Click for a larger view. But from a distance it does look quite good :)

My new Konad Top Coat also arrived today. I found it very thick and gloopy to work with- it took well over an hour to completely solidify on my nail. Next time I will try to use as small a layer as possible. Interested in seeing if it extends the life of my nail stamps any longer than my regular cheap top coat.

I added some white flowers from plate M3 to fill in some of the parts that didn't stamp,  it also helps the design to 'pop' as the black on pink is quite subtle.

I will try this plate again as I really want it to work! 


One of the better stamps! I really like the tulips @ the top :)

Randomly placed flowers to cover the gaps!